Layout Designer

The Layout Designer, step by step.

From a blank page to a finished yearbook — using the “ABIONNIERT” design as the example. Six steps, each with a real screenshot from the editor.

01

Pick a template

Open Manage → Book. Step 1 shows every design as a preview — cover, profile, quotes and the rest of the page types.

  • Templates holds the ready-made designs; once you have edited one, an Our designs tab appears next to it.
  • Click a design to select it — or start from nothing with Blank template.
  • The design applies to the whole book: cover, profiles, quotes, comments and rankings.
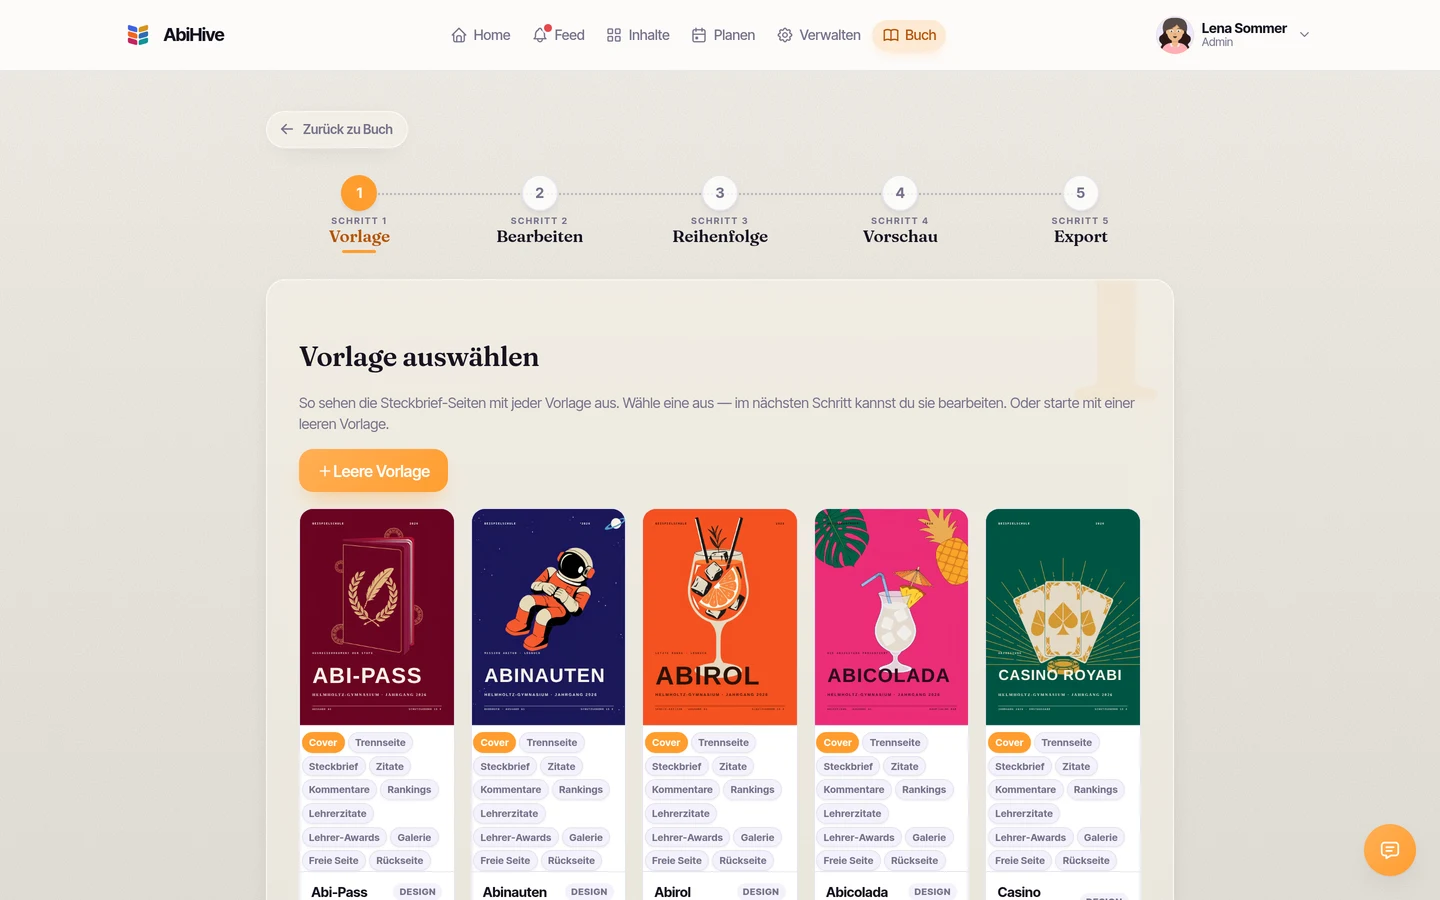
Step 1: the template gallery in the book editor, showing the covers of Abi-Pass, Abinauten, Abirol, Abicolada and Casino RoyABI side by side.
02

Edit it in the Layout Designer

Step 2 lists every page type the template brings. Clicking one opens it in the Layout Designer — saving turns it into your own template.

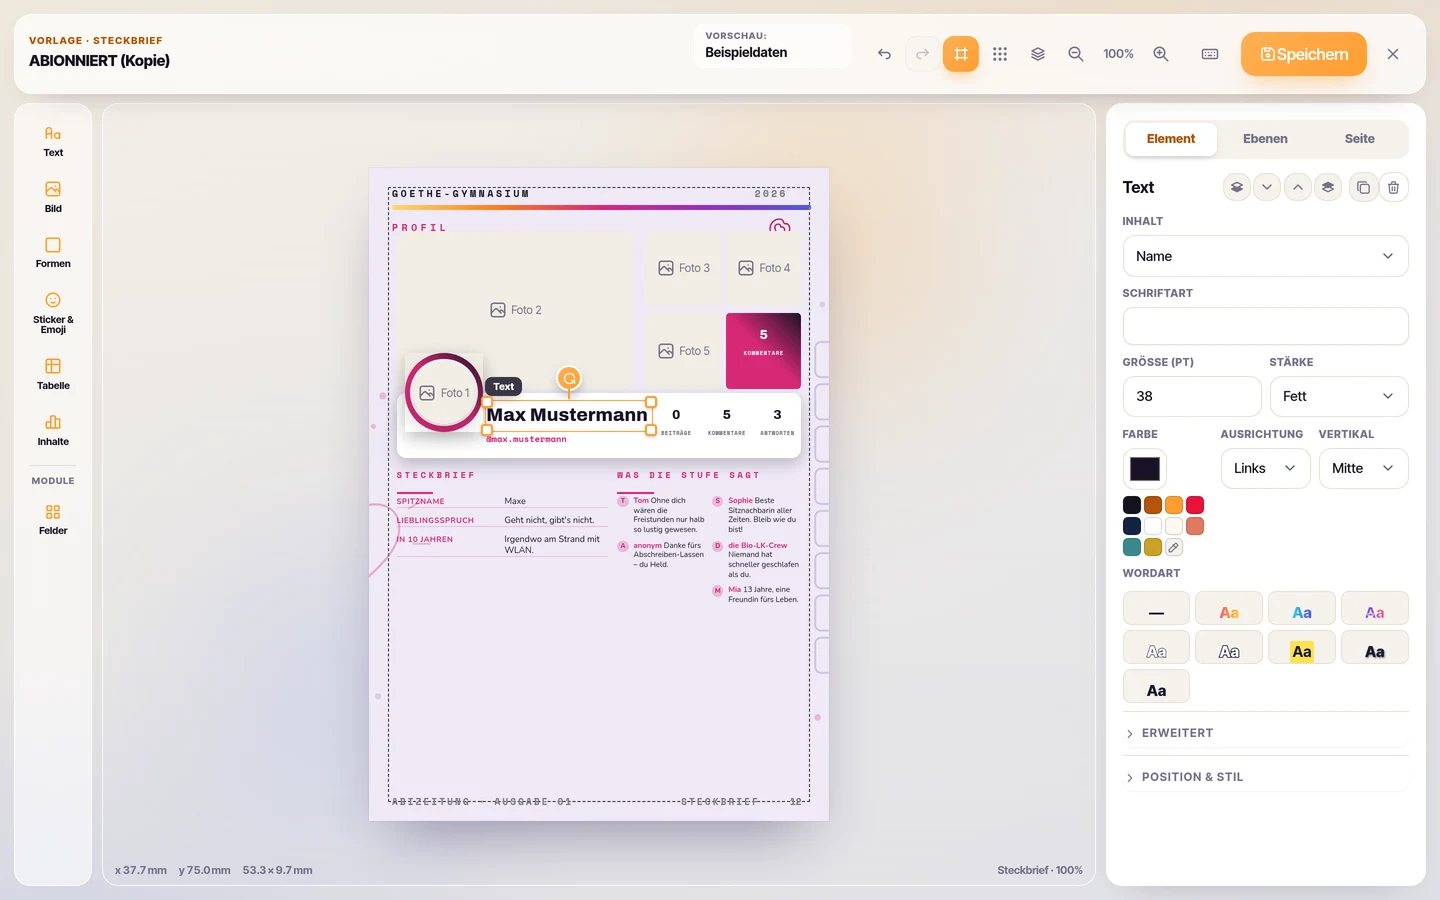
  • The tools sit on the left: text, image, shapes, stickers & emoji, table, content and fields (the profile answers that fill themselves in).
  • Each page type has its own layout — cover, profile, quotes, comments, rankings and the rest are picked one at a time back in step 2.
  • One click selects an element: its content, font, size, colour and alignment appear on the right, its measurements in millimetres at the bottom left.
  • Layers & background is where you lock, hide or reorder elements. Ctrl/⌘ + Z undoes every step.
Step 2: the Layout Designer with the ABIONNIERT profile page; the name is selected and its font, size and colour settings are on the right.
03

Check it against real data

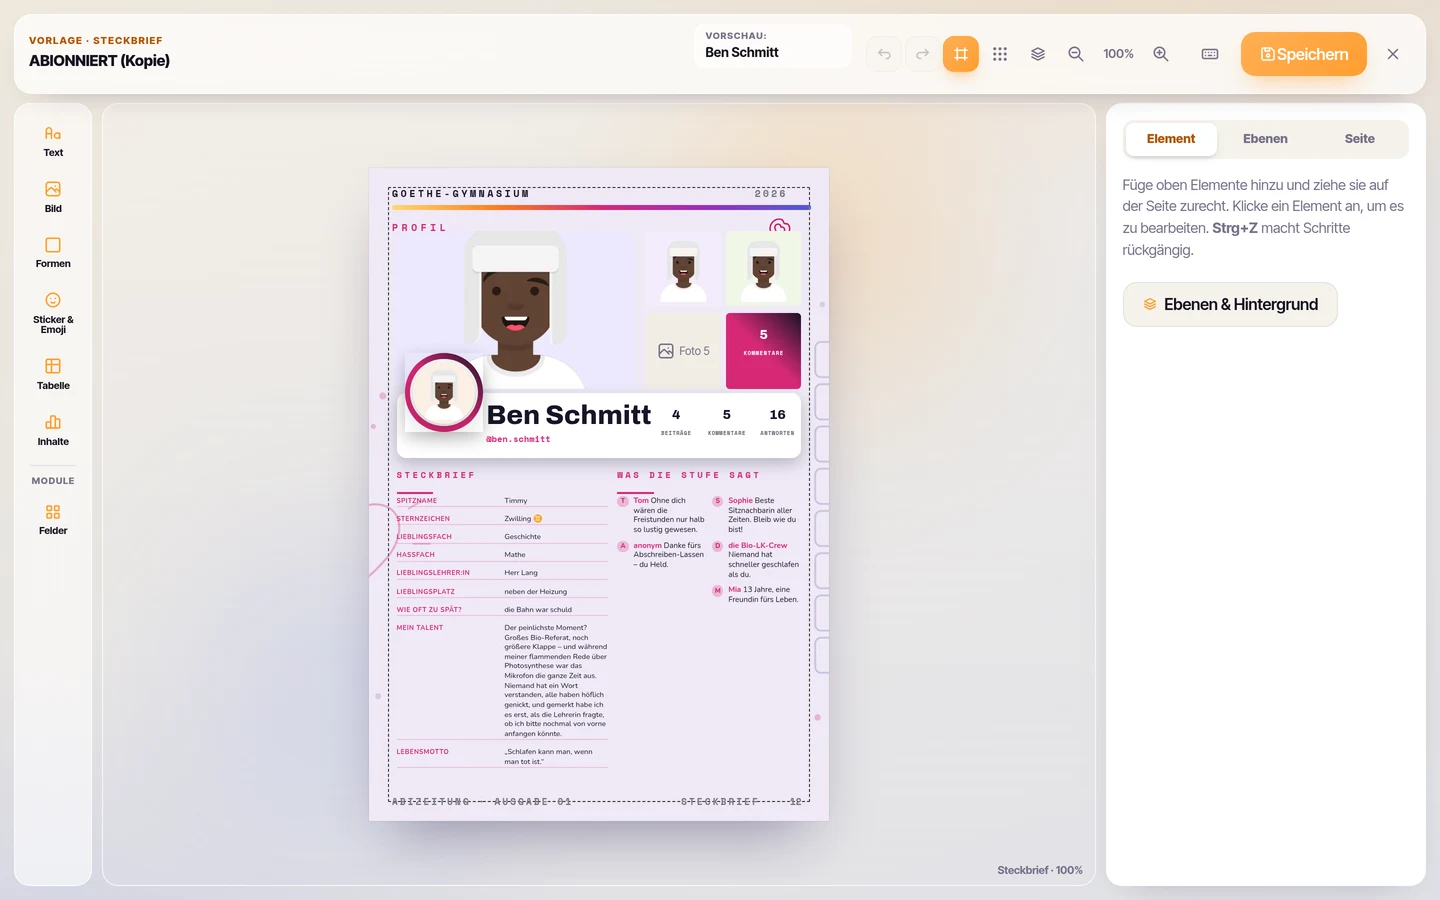
Switch the preview at the top from sample data to a real person from your year group.

  • You'll see straight away how long answers, several photos or short texts sit in the layout.
  • The design stays the same for everyone — only the content changes. Design one page, all the others follow.
Step 3: the same ABIONNIERT page with the preview switched from sample data to a real person — their photos, fifteen answers and one long paragraph.
04

Set the order and the contents

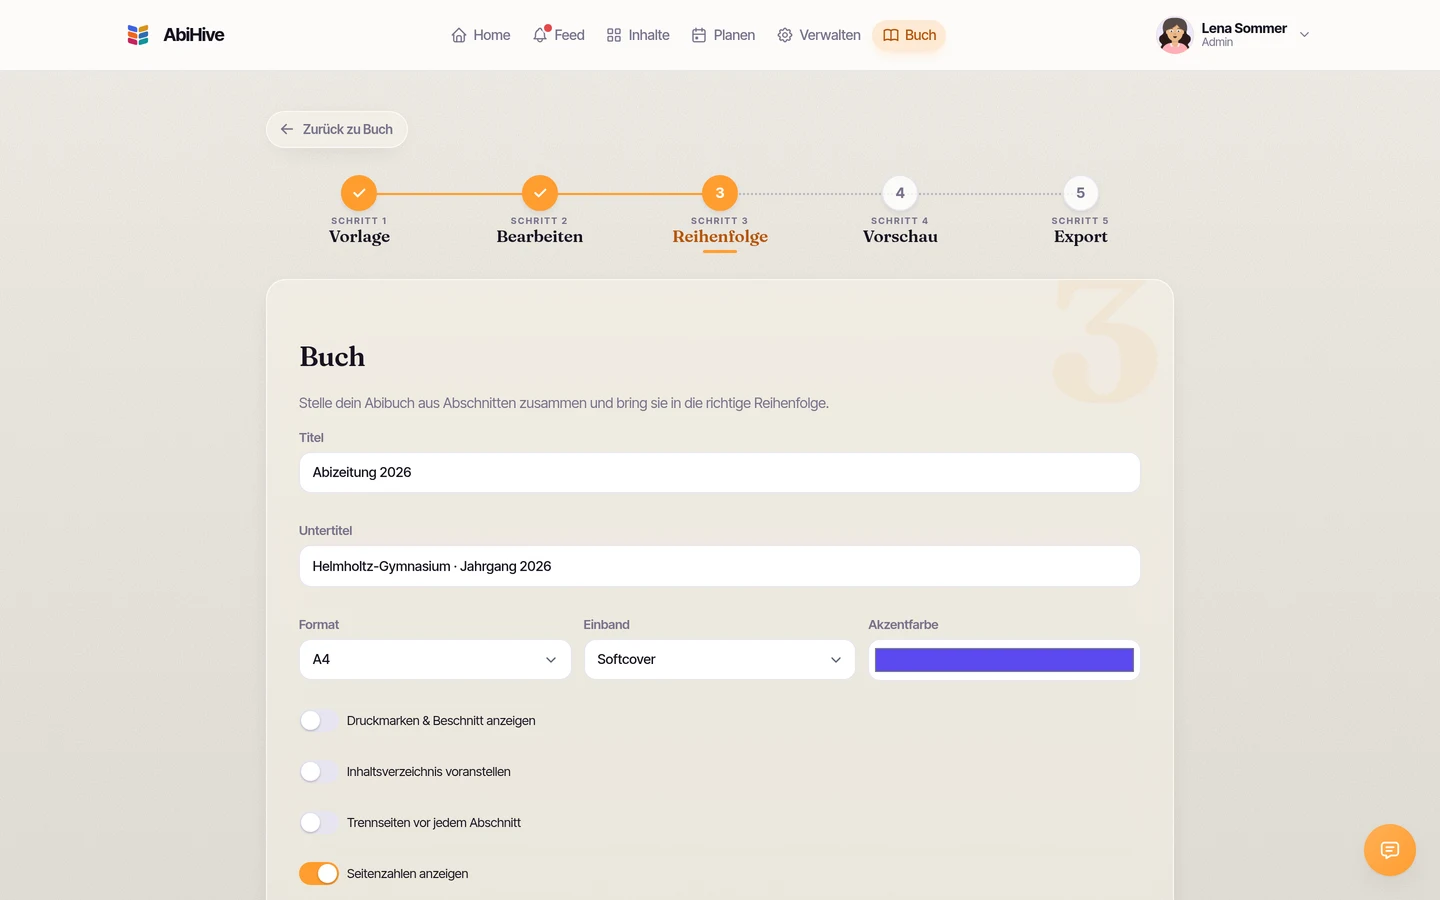
Step 3 is where you assemble the book: title, format and the order of the sections.

  • Choose an accent colour and set A4 or another format.
  • Optionally put a table of contents up front and add a divider page before each section.
  • Switch on crop marks & bleed for the printer if you need them.
Step 4: the book settings with title, subtitle, format, accent colour and options for the table of contents and divider pages.
05

Check the whole book

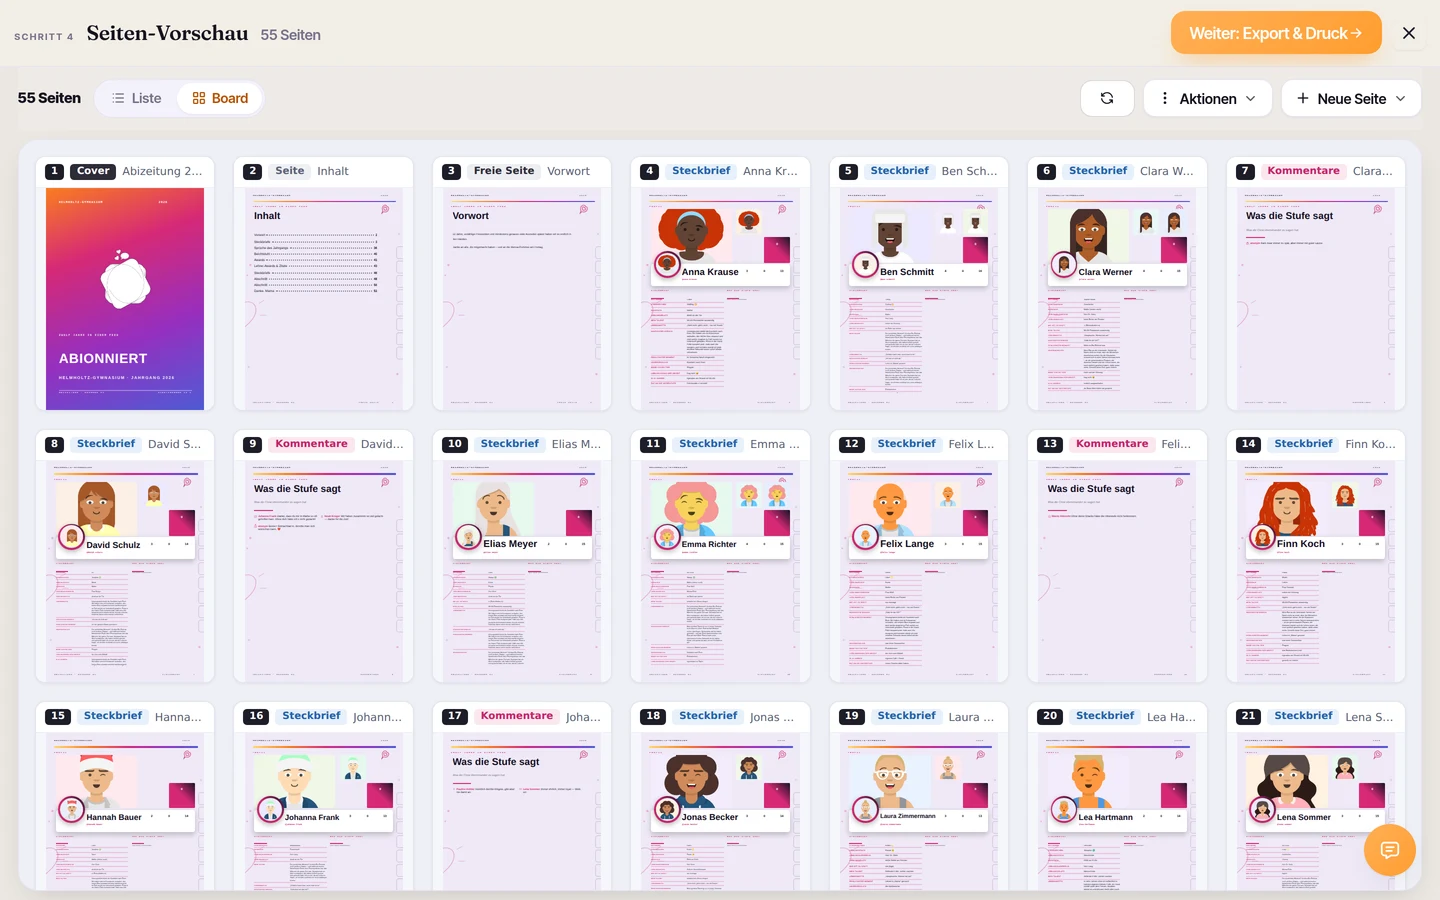
The page preview renders every page exactly as it will be printed.

  • Leaf through all the pages and check that everything sits right.
  • Edit this page takes you straight back into the designer for that one page.
Step 5: the page preview, which lets you leaf through every generated page of the book.
06

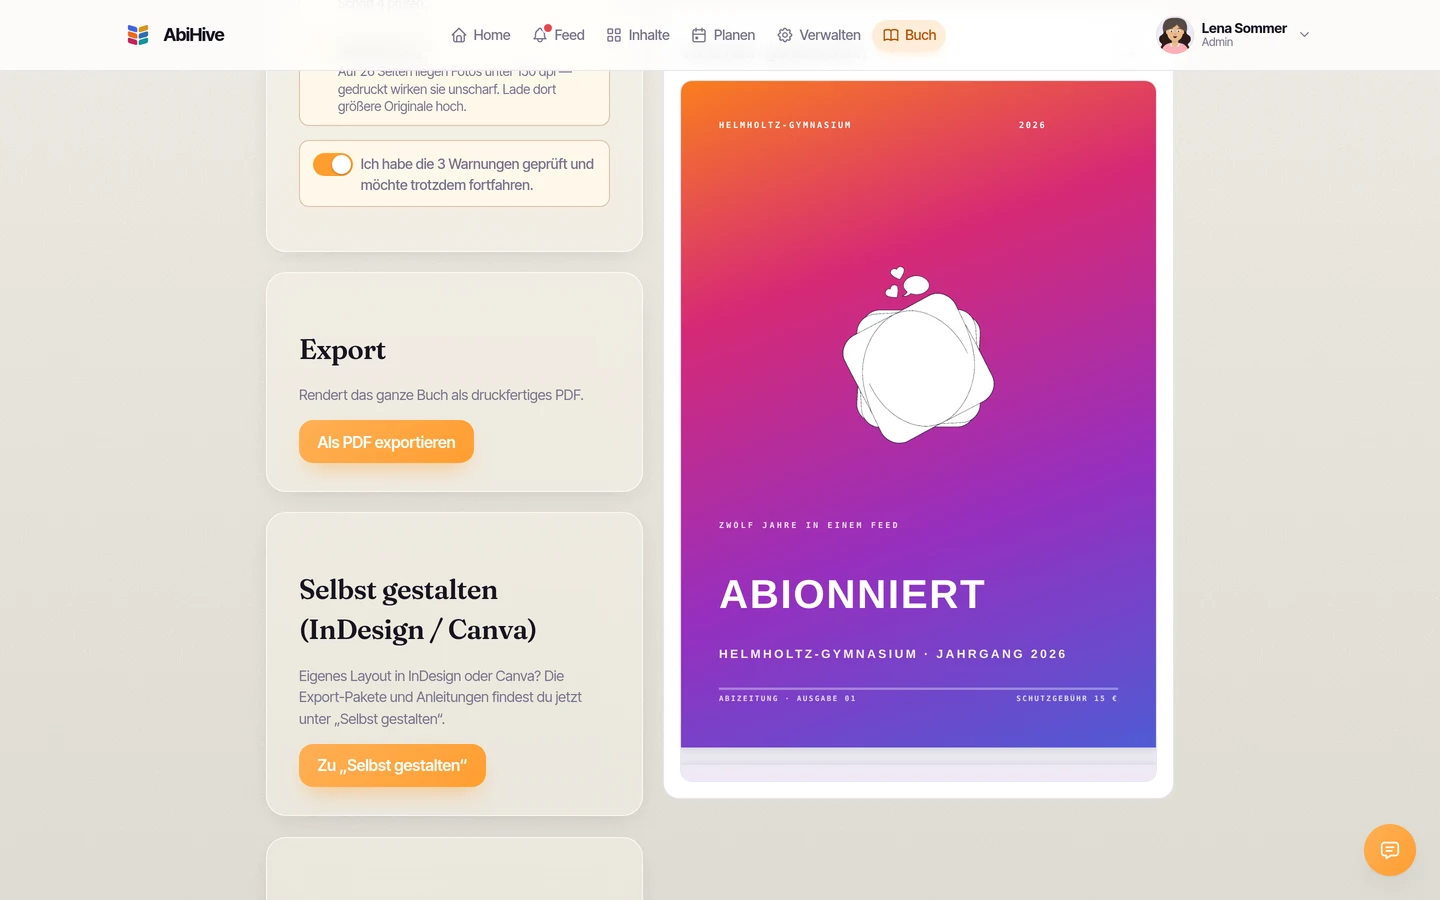
Export as a PDF

At the end, AbiHive checks the book for print readiness and turns all of it into a print-ready PDF.

  • The print check flags what would show up in print beforehand — photos placed too large for their resolution, say, or text running out of its box.
  • Export as PDF renders the complete book at print quality.
  • You hand that PDF straight to your printer — and the yearbook is done.
Step 6: the export card with the “Export as PDF” button, next to the cover preview of the yearbook.
done ↓

Your yearbook is waiting.

Create your year group, pick a template and start collecting.

Create a year group for free →